Teleport is an open-source tool that provides zero-trust access to servers and cloud applications using SSH, Kubernetes and HTTPS. It eliminates the complexity of setting up VPNs by providing a secure gateway to applications, servers and Kubernetes clusters. It was open-sourced by Gravitational Inc. in 2016 and is currently used in production environments by NASDAQ, IBM, Samsung, Epic Games, Ticketmaster e.t.c
Teleport can be used to:
- Act as a single solution to access your SSH servers, Kubernetes clusters, databases, desktops, and web applications.
- Define sophisticated access policies for every infrastructure component, with fine-grained audit logs and session recordings.
- Automatically on– and off-board users via integrations with single sign-on providers like GitHub, Okta, and Google Workspace.
Teleport can work best for the following scenarios:
- When a vast number of clusters must be managed using the command line (tsh) or programmatically (through the Teleport API) and you want to simplify your stack, security, and configuration complexity.
- When security team members must track and audit every user session.
- When resource and network security must be maximized, for example, SSH certificates over secret keys, Two-Factor Authentication (2FA), Single Sign-On (SSO), and short-lived certificates.
- When Teleport users require a complete, dedicated, and secure SSH option (Teleport Node running in SSH mode) and more than a certificate authority (Teleport Auth) with proxy (Teleport Proxy).
Teleport offers several features and advantages, some of which include:
- Session Recording: It records interactive user sessions for SSH and Kubernetes protocols and stores them in the audit log. These sessions can be replayed via a built-in session player.
- Audit Log: All the events are recorded and stored in an audit log for compliance purposes. The collected events include authentication attempts, file transfers, network connections, and file system changes made during an SSH session.
- Access Proxy: It provides SSH and HTTPS access to servers, applications, and Kubernetes clusters across multiple data centres, cloud providers, and edge devices.
- IoT Access: The servers with Teleport can be accessed by clients regardless of their physical location, even when they are using a cellular connection.
- Web UI: It offers a web-based client for configuration, accessing servers via SSH and Kubernetes and for accessing the audit log.
- Dynamic Authorization: The users can request a one-time permissions elevation to complete a privileged task. The requests can then be approved or denied via chat ops tools such as Slack, Mattermost, or a custom workflow, implemented via Teleport API.
The available editions for Teleport are:
- Open Source Teleport: Offers a platform to learn how to host your own open-source Teleport deployment on a standalone Linux server.
- Teleport Enterprise: Here you get started with a self-hosted Teleport Enterprise deployment, which gives you more advanced features and full customization.
- Teleport Cloud: Try our cloud-hosted version for free.
Today we will learn how to run Teleport in Docker Container using Docker Compose.
Step 1: Install Docker Engine / Compose
For this guide, you require to have Docker installed. The below guide can be used to install Docker Engine on Linux:
Once installed, add your system user to the Docker group.
sudo usermod -aG docker $USER
newgrp docker
Now proceed and instal Docker-compose.
Step 2: Provision the Teleport Container
For this guide, we will begin by exporting the Teleport container image as a variable. There are several images you can use to spin the container.
Export the desired image with the command:
##Open-Source Image
TELEPORT_DOCKER_IMAGE=public.ecr.aws/gravitational/teleport:12

##For Enterprise
TELEPORT_DOCKER_IMAGE=public.ecr.aws/gravitational/teleport-ent:12

#For Enterprise FIPS
TELEPORT_DOCKER_IMAGE=public.ecr.aws/gravitational/teleport-ent:12-fips
Once the image has been exported, you can create the persistent volumes for the Teleport container. These will be used to store configurations and data for the container.
mkdir -p ~/teleport/{config,data}On Rhel-based systems, you need to set SELinux permissive mode.
sudo setenforce 0
sudo sed -i 's/^SELINUX=.*/SELINUX=permissive/g' /etc/selinux/config
Set hostname of your system, preferably to FQDN. Replace teleport.example.com with correct domain name for this server.
sudo hostnamectl set-hostname teleport.example.comUpdate /etc/hosts file with the domain name and its IP address.
$ sudo vim /etc/hosts
192.168.1.12  teleport.example.com
Export hostname configured as variable.
TELEPORT_HOSTNAME=" teleport.example.com"Now generate a sample config and save it to the local directory, the container will exit once the configs have been generated.
docker run --hostname ${TELEPORT_HOSTNAME} --rm \
  --entrypoint=/bin/sh \
  -v ~/teleport/config:/etc/teleport \
  ${TELEPORT_DOCKER_IMAGE} -c "teleport configure > /etc/teleport/teleport.yaml"
Step 3: Run Teleport in Docker Containers
Now in this guide, we can spin the container in two ways. These are:
- Using the Docker CLI
- Using Docker-Compose
Method 1 – Run Teleport using the Docker CLI
From the command line, you can easily spin the Teleport container using the command:
docker run -d  --hostname ${TELEPORT_HOSTNAME}  --name teleport \
  -v ~/teleport/config:/etc/teleport \
  -v ~/teleport/data:/var/lib/teleport \
  -p 3023:3023 -p 3025:3025 -p 3080:3080 \
  ${TELEPORT_DOCKER_IMAGE}
The specified image will be pulled and the container started. Check the status of the container.
$ docker ps
CONTAINER ID   IMAGE                                      COMMAND                  CREATED          STATUS          PORTS                                                                                                                             NAMES
6ee4b65bb01e   public.ecr.aws/gravitational/teleport:12   "/usr/bin/dumb-init …"   45 seconds ago   Up 44 seconds   0.0.0.0:3023->3023/tcp, :::3023->3023/tcp, 0.0.0.0:3025->3025/tcp, :::3025->3025/tcp, 0.0.0.0:3080->3080/tcp, :::3080->3080/tcp   teleport
Method 2 – Run Teleport using Docker-compose
For production, it is recommended to spin containers using Docker-compose. We will create a simple configuration file for the container.
vim docker-compose.ymlIn the file, add the below lines
version: '2'
services:
  teleport:
    image: public.ecr.aws/gravitational/teleport:12
    container_name: teleport
#    entrypoint: /bin/sh
    hostname: localhost
    ports:
      - "3023:3023"
      - "3025:3025"
      - "3080:3080"
    volumes:
      - ~/teleport/config:/etc/teleport
      - ~/teleport/data:/var/lib/teleport
save the file and start the container with the command:
docker compose up -dVerify if the container is up:
$ docker ps
CONTAINER ID   IMAGE                                          COMMAND                  CREATED         STATUS         PORTS                                                                                                                             NAMES
h83d61fg09ts   public.ecr.aws/gravitational/teleport:11.3.1   "/usr/bin/dumb-init …"   2 minutes ago   Up 2 minutes   0.0.0.0:3023->3023/tcp, :::3023->3023/tcp, 0.0.0.0:3025->3025/tcp, :::3025->3025/tcp, 0.0.0.0:3080->3080/tcp, :::3080->3080/tcp   teleport
Step 4: Access the Teleport Server
Once the installation has been done using any of the above methods, we need to access Teleport. But first, we will create a user.
$ docker exec teleport tctl users add admin --roles=editor,access --logins=root,ubuntu,ec2-user
User "admin" has been created but requires a password. Share this URL with the user to complete user setup, link is valid for 1h:
https://teleport.neveropen.co.za:3080/web/invite/29c6c313eeb69b66b0d320a4a15ea9e8

NOTE: Make sure teleport.neveropen.co.za:3080 points at a Teleport proxy which users can access.
To complete the setup, you are required to access the web UI using the displayed URL.
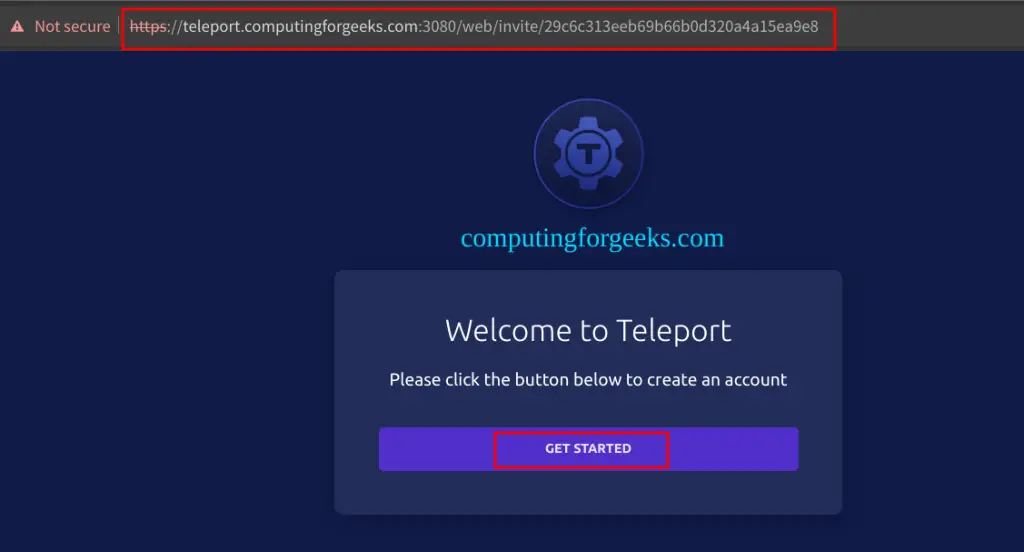
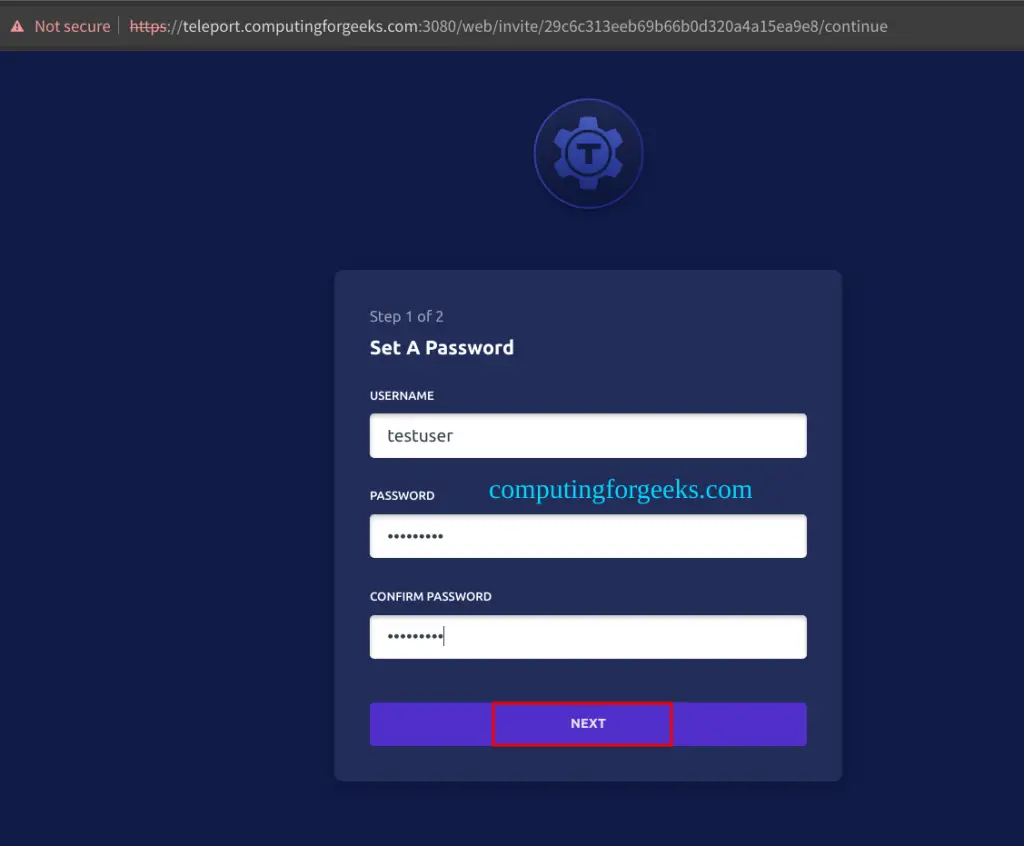
Create a password for the user.
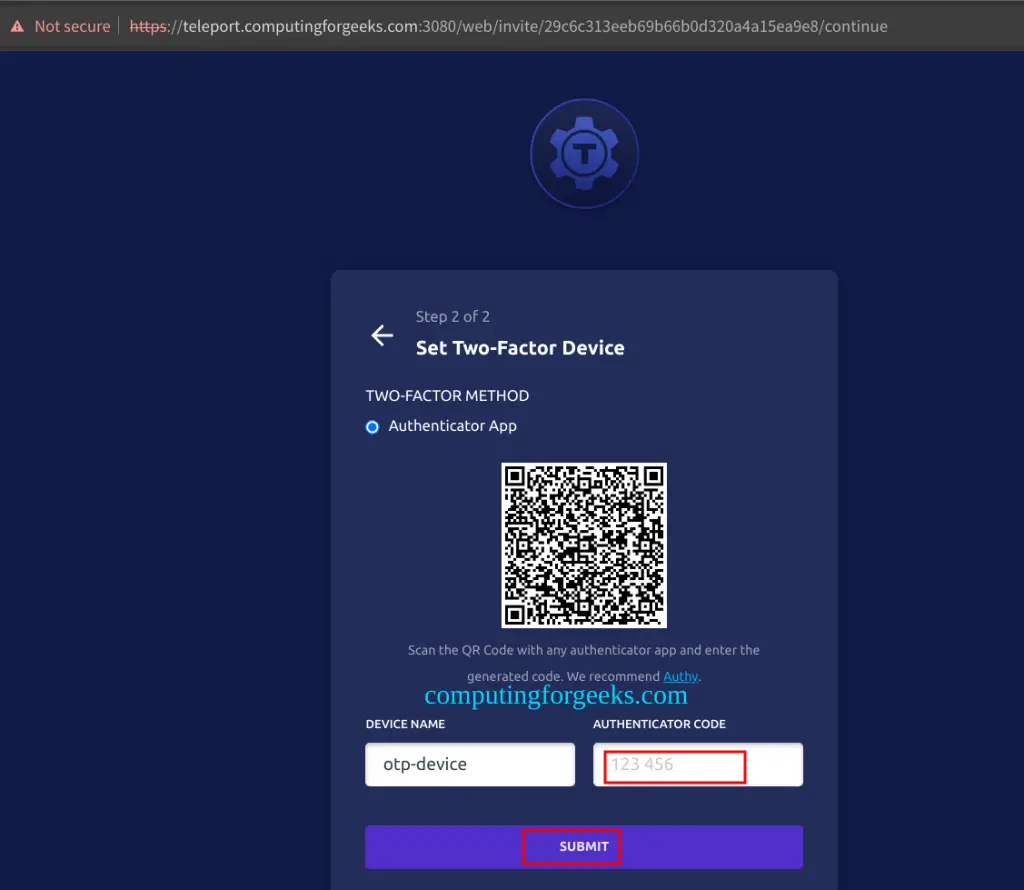
Install and authentication application to server as MFA on a second device.

Provide the code on the authenticator app and proceed.
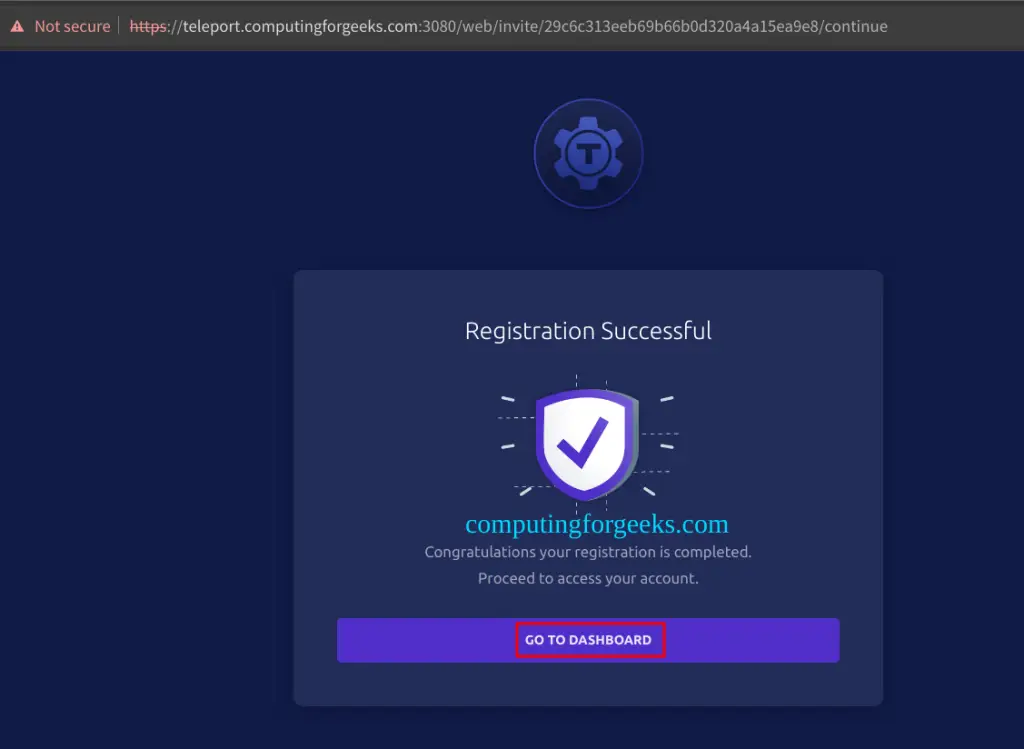
Once the registration is successful, you can proceed to the dashboard and manage Teleport as desired.
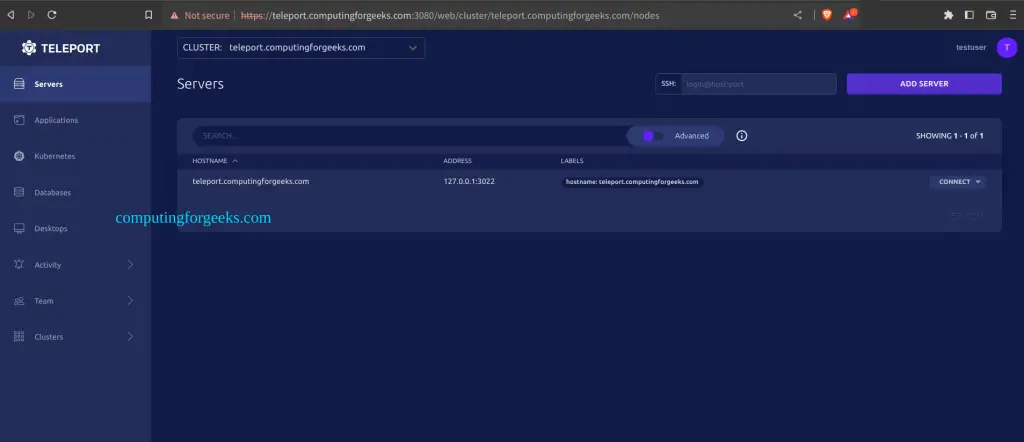
Below is the Teleport dashboard with the one server we have deployed.
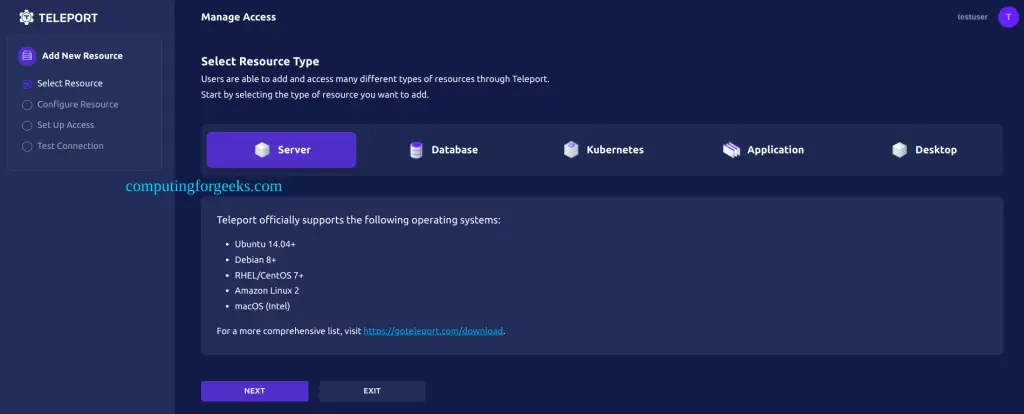
You can add servers, databases, and Kubernetes clusters and access them easily using this secure gateway.
Step 5: Install the Teleport Client
You can still connect to Teleport from a client machine. All you need to do is install Teleport. On Linux, this can be accomplished using the command:
curl https://goteleport.com/static/install.sh | bash -s 12.2.1On Windows, you can download Teleport for Windows and install the app by double-clicking on the file. After the installation, you can connect the Teleport using the command
##On Localhost
tsh login --proxy=localhost --insecure --user=admin

##On a remote clientset-up
tsh login --proxy=<teleport_domain name>  --insecure --user=admin
The --insecure flag is not recommended in production environments. Here it has been used to bypass certain TLS and port requirements when testing.
To connect successfully, provide the password for the user and the One-Time Passcode on the authenticator app.
Sample Output:

To view the available nodes, use the ls command shown.

You can then connect to the node with the command:
ubuntu@test:~$ tsh ssh root@localhost
root@teleport:~#
The above command should bring up the Linux bash where you can issue commands, traverse the directory tree, and explore the container contents.
Step 6: Managing the Teleport Container
The Teleport container can be started and stopped using the below docker commands:
- Using Docker CLI
##To start
docker start teleport

##To stop
docker stop teleport- Using Docker-compose
##To start
docker compose start

##To stop
docker compose stop
Conclusion
That marks the end of this guide on how to run Teleport in Docker Containers using Docker Compose. I hope this was of great importance to you.
Related guides:
